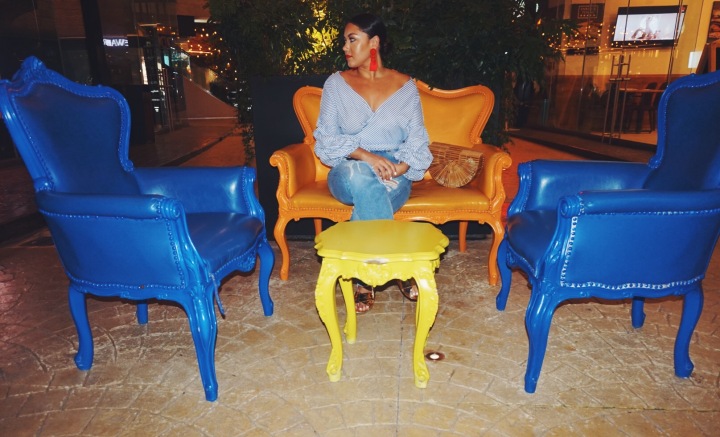
Art Basel can be a fun time in Miami. However, if you’re a local although we love the cool art and parties, Art Basel equals a whole lot of traffic, street closures and long lines. Not to sound like Miss Grumpy but it’s true! However, this year my friends and I found a cheap deal on Groupon to attend the Spectrum Miami show so we ventured out last Saturday. The Spectrum show was a large tent located not too far from Wynwood with various types of art, music and of course a bar. 😀
We had a great time critiquing the art we know absolutely nothing about, ha! If you’ve never been to Miami during Art Basel and you’re interested in art/events/night life then I’d definitely recommend making the trip. As a local I sometimes take for granted the cool events and hot spots the city has to offer.
Keep scrolling to see a view pics from that night.
I took advantage of the gorgeous weather in Fort Lauderdale today and after a spin class I went to a cute local spot for a healthy bite & one of the best iced coffees in town at The Alchemist. I hadn’t been there in a few months but was pleasantly surprised when I saw all the new things they added. You can always count on The Alchemist to offer you fresh, good food with a homemade feel. But now in addition to the quaint, hipster cafe they now have two other cafes, a garden bar, a boutique clothing/accessory store, antiques for sale and amazing street art. They even have live music! It’s like an antique yard sale but with food, music and art.
Every time I go to The Alchemist I ask myself “Why don’t you come here more often?!” I highly recommend to anyone living or visiting in the area. I make it a point to support the local cafe coffee shops as often as possible. Most of them in the east Fort Lauderdale area have quality beverages and food and a pleasant environment.
Here are a few pictures of The Alechemist and the surrounding area described above, enjoy! 🙂
This year my family and I switched it up and opted for a casual buffet at The Fontainebleau Hotel on Miami Beach. It was beautiful, comfortable and just what we needed. The food was good and the ambiance was even better. I’d highly recommend it for a small group or those of you traveling to Miami for a Thanksgiving Vacation.
Although I always prefer a traditional home-cooked Thanksgiving meal, this was still amazing and I was just thankful to have my family there to celebrate.
Keep scrolling for a few family pics and a breakdown of my easy look!
I’m going to give myself two snaps for pulling off this makeup look all while being sick!
A few products I used are:
Fenty foundation & Makeup Forever’s cream stick foundation
Contour- Tarte Shape Tape Concealer and Smashbox Studio Skin Shaping Foundation
Ardell Lashes in Wispie
Makeup by Mario Eyeshadow Pallete & Tarte, ‘Tartlette in Bloom’ pallete
Bronzers- Hoola by Benefit, MAC and Milani
Blush- I mixed a few different MAC ones
Lips- Stripdown lip liner and Florabundance lipgloss both by MAC
Highlight- Opal by Becca
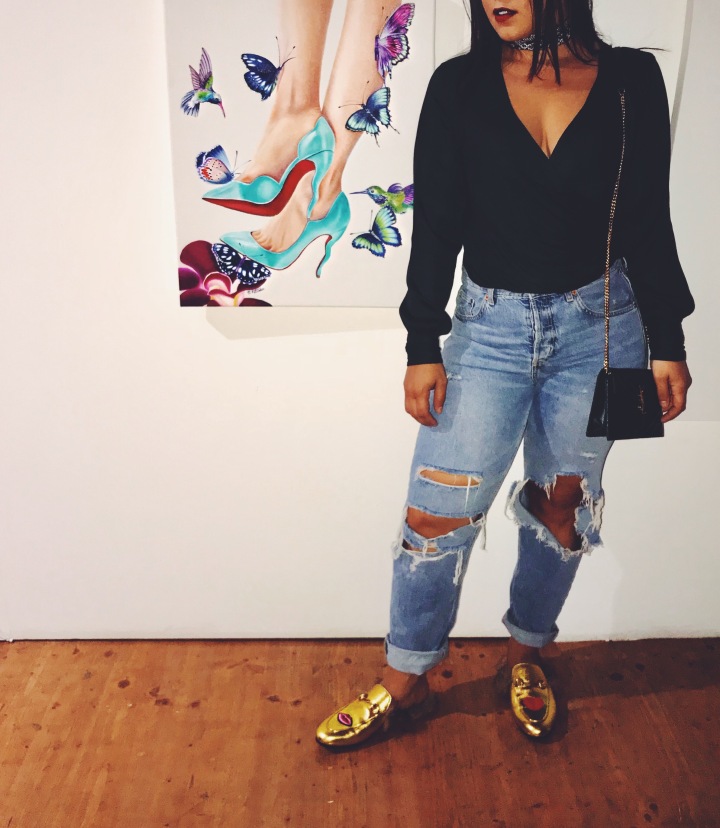
Silk Kimono: Forever21
Jeans: Old Navy- Sculpt Series (I cut the bottom of them ✂️)
Shoes: ASOS
I hope you had an amazing Thanksgiving with your family & loved ones! 🧡
As much as I love good food and the pleasure it brings me to know I’m getting better at cooking each time, it’s still a bit like pulling teeth to get me to cook all my meals consistently. Therefore, I try to find good, quality dishes to make that can last me at least 2-3 meals.
There are tons of posts and recipes on “meal prepping” which require you to cook 1-3 different meals and measure them out for a whole week. I’ve tried this before and ehhh, I’m over the grilled chicken and soggy asparagus after about two days. It personally doesn’t work well for me, clearly LOL. By the third day of eating meal prepped food I become “fangry” (angry at my food). I start to hate it and grow disgusted of eating the same thing. Dramatic, probably, but if I am going to spend $70+ on buying the ingredients and 2 hours prepping the food then I think I should at least enjoy eating it!
Sidenote: Since April of this year I’ve been on my own fitness/health journey. I’ve lost about 17-20 pounds since then and overall I’m proud of myself. I’ve tried to be “healthy” and workout consistently for the last five years but have never been able to achieve the goals I had in mind. But this year I found a diet and workout regiment that works for me, along with an awesome support system to help me through things. I will put together a separate blog post that explains how I lost weight and what works for me.
All of that said, I try to keep it clean, tasty and more importantly use fresh ingredients. This chicken soup recipe was passed down from my Mom and I’ve kind of made it my own. This recipe is much lower in sodium than most soups and can be tweaked in a few different ways to be carb free and meet the restrictions of some popular diets.
Keep reading to learn how to make this yummy, healthy and simple chicken noodle soup.
What You Need:
Chicken thighs (boneless & skinless preferred/much easier): the amount is up to you and depends on the size of your soup pot. I used about 1.7 pounds this specific time
Chicken Broth (Unsalted): 1-1.5 32 oz box… getting unsalted or low sodium is key here if you want to keep this receipe as low in sodium as possible
Carrots: you can use the pre cut ones like pictured or chop up 2-3 big carrots. You can add more or less depending on your preference
Cilantro: a little less than handful chopped
Celery: 3-4 long stocks chopped
Onion: 1 whole onion diced
Garlic: 3-4 cloves finely chopped
Optional: 1 Chicken Buillon cube (if you want to keep it really low in sodium then do not use this)
Optional: Noodles or Cauliflower Rice… I normally use the No Yolk Whole Grain Egg Pasta Noodles. However, if I am trying to cut carbs I will often use Cauliflower Rice or nothing at all. Cauliflower rice is a great substitute for the noodles in this receipe and you really don’t feel like you are missing anything.
Seasonings: salt, pepper, garlic powder, onion powder, Italian mix, etc.
Step One
Fill a large soup pot with water about half way and add a pinch of salt. Place the chicken in the pot and set it to boil. Let this cook for about 15-20 min.
While the chicken is boiling, start chopping your veggies (onion, carrots, celery, cilantro and garlic).
Step Two
The chicken should be mostly cooked after about 15-20 minutes but not fully cooked. I like to drain about 25-35% of the water from the pot. Take the pot off the burner and let the water sit.
Take all of the chicken out and place on a cutting board. Take two forks, one in each hand and begin shredding the chicken. Do this to all of the chicken thighs. Then place the shredded chicken back into the pot with the water.
Step Three
Add the box of chicken broth to the pot with the chicken and water. Put this back on the stove on medium heat.
Add all veggies and seasonings to flavor. Also add the cube of chicken buillon (optional). I eyeball my seasoning and continue to taste the broth as it cooks and add more need be. Be conservative with the salt, I highly recommend switching to Pink Himalaysian salt if you haven’t already. It’s a more pure form of salt and much better for you. However, you should still limit your intake.
Let this cook on medium to medium low heat for about 30 minutes.
Step Four
Once the flavor is to your liking and the carrots and celery are semi soft you can add the noodles and or cauliflower rice. Let the soup cook for an additional 5-6 minutes until the noodles are done.
Don’t be alarmed, I am not engaged nor a future bride! I just figured the saying went with the look and occasion. 🙂
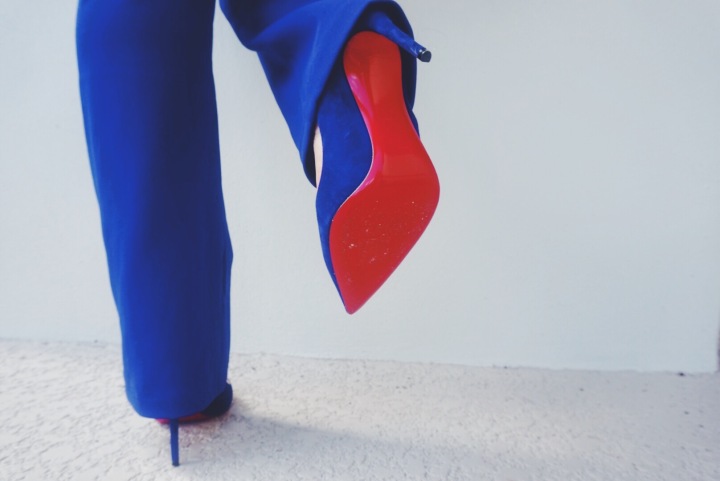
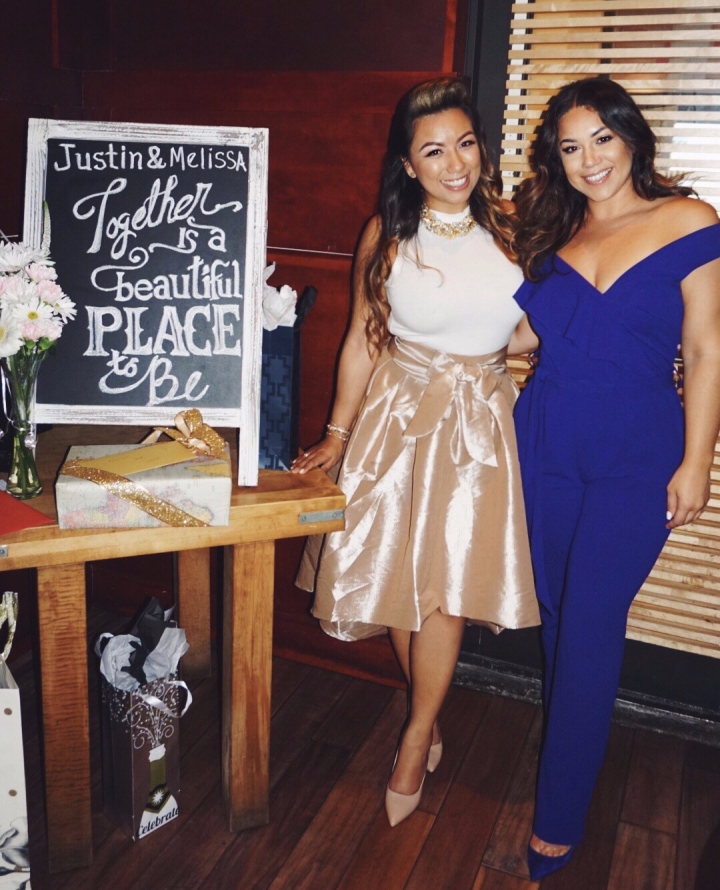
Last weekend was all about LOVE and in my case the color blue. I had the pleasure of attending an intimate wine tasting to celebrate the engagement of my dear friends, Melissa and Justin. I had a blast and couldn’t be happier for my friend and her fiance. If the engagement party was a taste of how the wedding will be, then I can’t wait for their big day!
I love a good monochromatic look. I put this outfit together the morning of (bought the jumpsuit two hours before) and was first focused on my shoes. I bought these shoes at least five months ago but had yet to wear them. So when I found this jumpsuit, I knew it was meant to be! (Pun intended- all my shoes are my soulmates ❤ )
I love a monochromatic look for a few reasons:
1) all though the idea is to stick to one color, you can get creative with incorporating different shades, textures and/or patterns
2) it’s flattering and chic on all shapes, sizes and ages
3) it makes a statement and I feel you should make a statement with every outfit
Take a look at how I created this simple yet pretty monochromatic look for an engagement party. Keep scrolling to see where I purchased this jumpsuit. You will never guess where it is from…
Jumpsuit: I got this jumpsuit from, drum roll please… ROSS for $19.99!!! Insane, I know. The best part is it did not look cheap in person and it fit me like a glove. I am a short nugget and normally have to get things like this professionally hemmed but the length was just fine and I wore it as is.
Here are some similar styles:Lulus, ChicMe, Cichic, Nordstrom (a bit pricier but they have a decent selection of various blue styles)
STYLE TIP: This jumpsuit is actually not off the shoulder. I love an off the shoulder look so I simply unzipped the back zipper slightly and pulled it down my shoulders. With a little tuck in the cleavage area and back zipper, I was ready to go! Don’t be afraid to experiment and create your own look! Maybe it’s the craftiness in me but I do this all the time. I will cut jeans, shirts, tie things or remove different pieces to create the look I want and more specifically what will look best on me and my body. I’m also not afraid to whip out some crazy glue need be.
I say this to my friends all the time, the key to having “style” (whatever your definition of that may be) is to pick items that flatter YOUR body.
Purse: Louis Vuitton that was handed down to me by my Mom about 6-7 years ago. I don’t see the same style/color on their site now but here is a really cute similar look- LV Alma BB
This is just one version of a monochromatic look featuring the color blue however, you can turn this into whatever color you want. Hmmmm what color should I do next? Stay tuned for more looks for the Fall and holiday seasons. 🙂
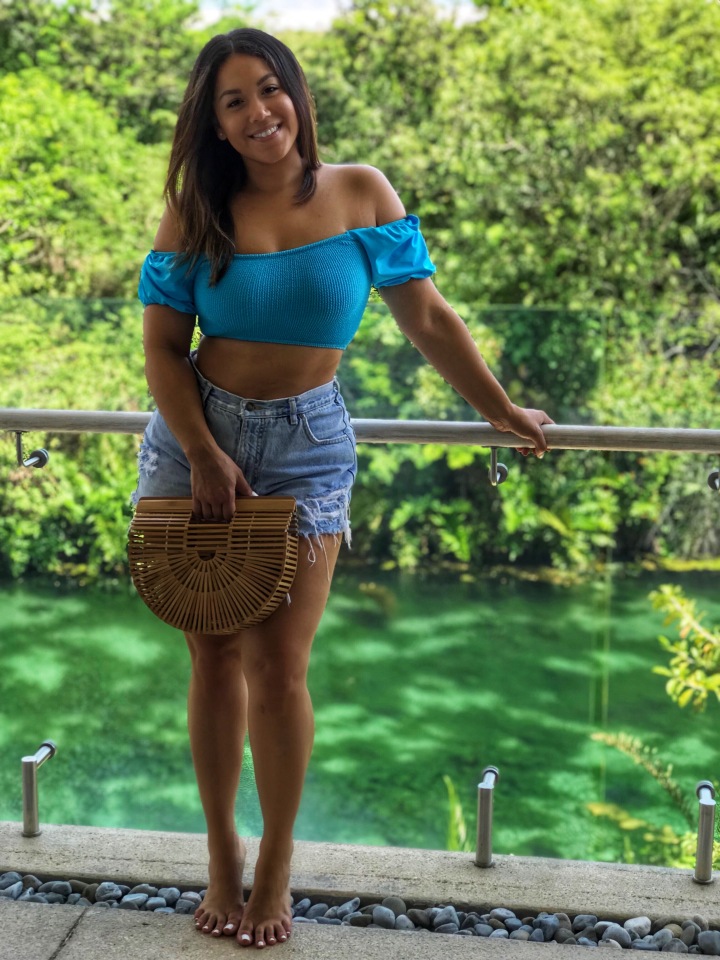
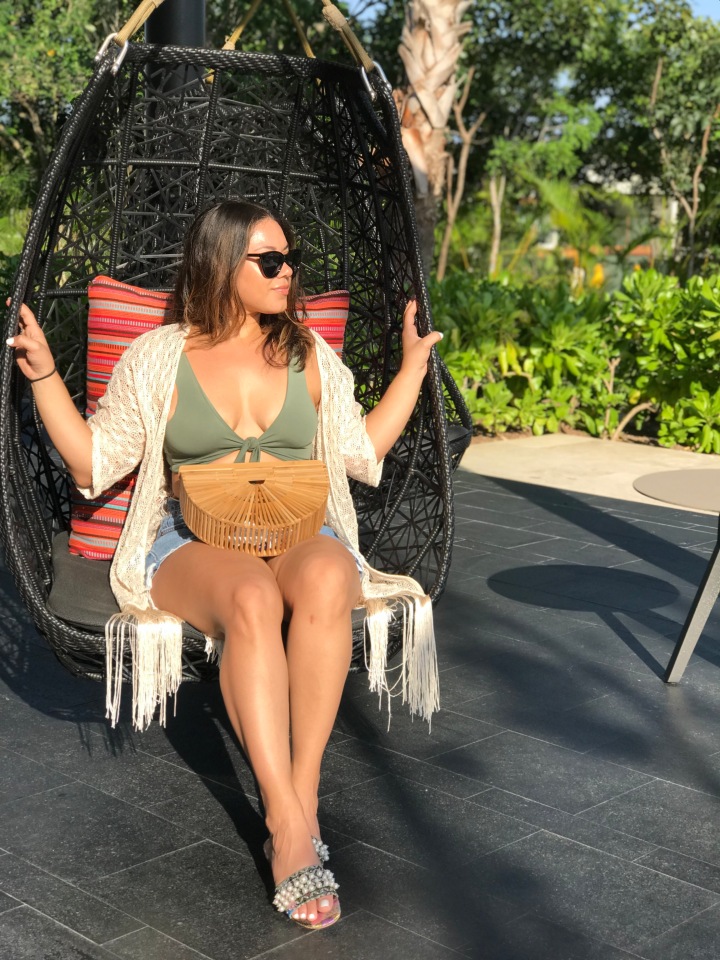
At the end of October I took a much needed vacation to Playa del Carmen, Mexico. It was a relatively short trip but it was exactly what I️ needed… the beach, sun and a whole lot of Mexican food! We flew into Cancun and then took a car service to our resort which was located on the Mayakoba property. Mayakoba is a gated property with 3-4 hotel resorts on it. I️ honestly didn’t know much about the property prior to booking however, Trip Advisor, Yelp and Google all showed excellent reviews on not only our specific hotel but the entire Mayakoba property, so I decided why not try it out. I booked in early August when TravelZoo was running a sale promo.
Our hotel was Andaz Mayakoba and it is apart of the Hyatt Group. I am a bit OCD about hotels and I have a specific preference. All I can say is this one did not disappoint! I️ can’t say enough good things about this hotel. From the grounds, to the food to the staff, they were all exceptional. Upon booking I️ didn’t realize October was slow season for Cancun and Playa del Carmen so the hotel was relatively empty. However, that worked in our favor since we were aiming for a more relaxing vacation.
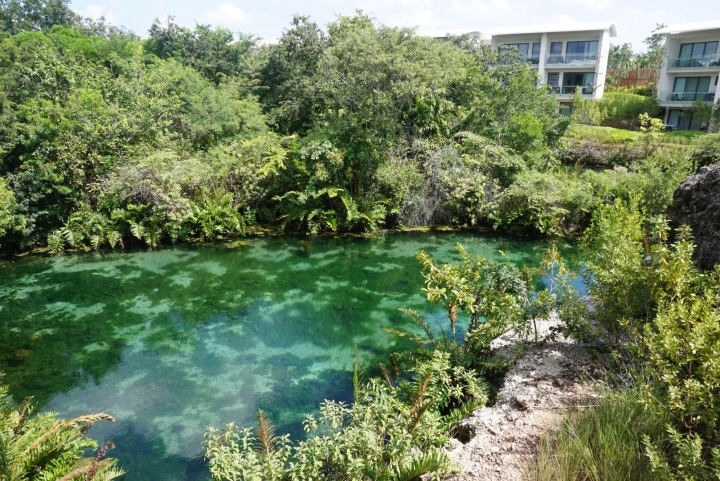
Andaz has a modern, nature-centric feeling to it. It is surrounded by lush greens, a gorgeous lagoon and wildlife. There are cool, interesting murals throughout the hotel that I loved as well.
I was greeted immediately upon entering the lobby by the helpful staff. They sat me down in a pleasant seating area and came directly to me to check me in. It is not like your typical walk-up-counter style check in. The lobby of the hotel is a circular shape with an interesting pond in the middle which I learned is fashioned after a ‘cenote’ (natural sinkhole). Another unique touch to the Andaz experience was the jewel stones they give guests to throw into the cenote for good luck. It’s a shallow pond and you see a bunch of shimmering stones at the bottom. I thought this was such a cool idea. They give all guests a complimentary drink, ours was a tequila mixed drink that was tasty but a bit strong for me! 🙂
After check-in we were taken on a quick golf cart tour by the staff and then dropped off at our room where the luggage was already waiting. I opted for a lagoon view room which was considered an upgrade from the standard room. The next available option was a beach view.
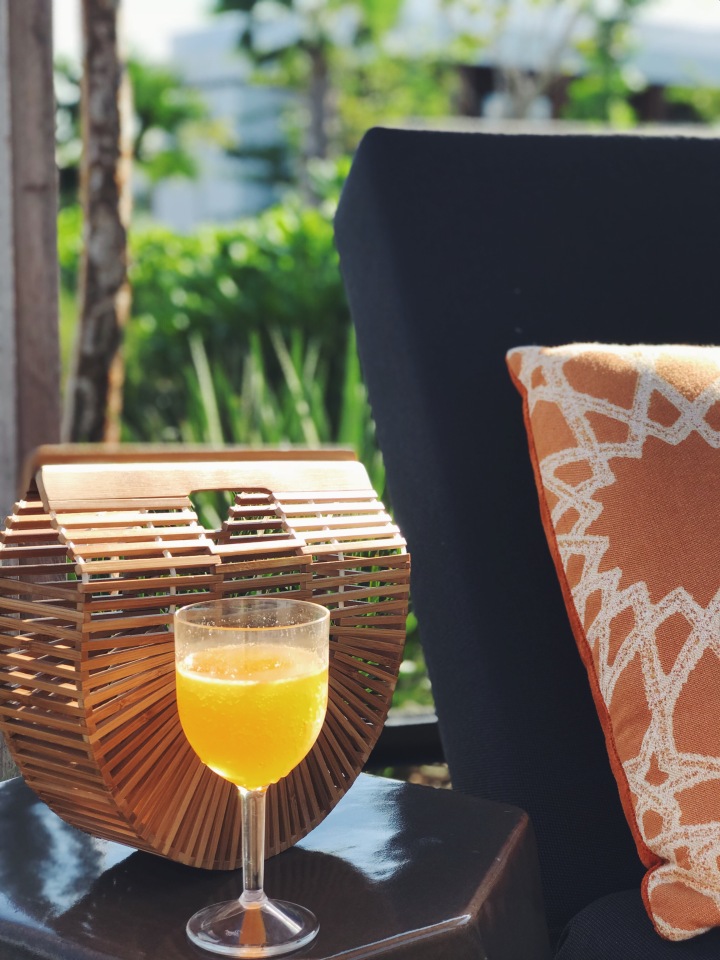
Beach essentials: bamboo bag, sunnies and a cold drink
Andaz provides free bikes stationed all through out the property to use at your leisure. I read about this amenity upon booking and was so excited. The spin fanatic in me couldn’t wait to try them out! They were just the cutest things and matched the nature/mod resort vibes perfectly. Not to mention the bikes helped me burn off the breakfast buffet I stuffed my face with every morning because of course vacation=carbs. Every morning a chocolate croissant was a must have.
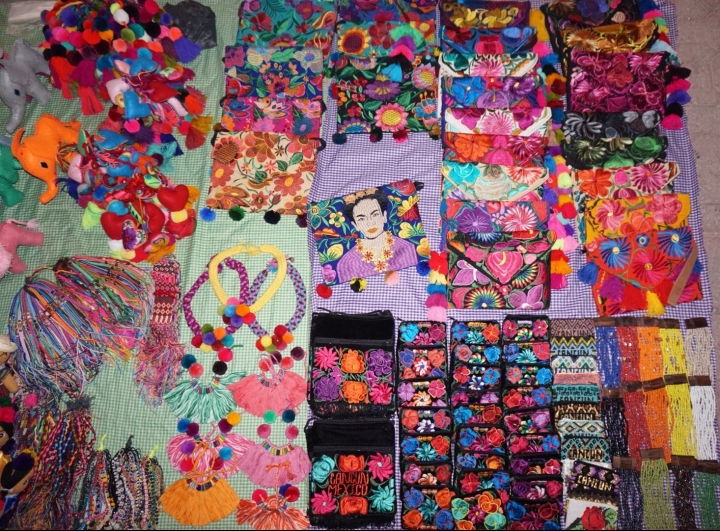
On our last night we took a break from the delicious tacos, guac and yummy Mexican queso and decided to have Italian food. We ventured off the Mayakoba property and took a taxi to Fifth Avenue, which was about 15-20 minutes away and cost about $20 USD. To be honest, I envisioned this street would look like a tacky, spring break party street and I was a little nervous. However, I was completely wrong! There are beautiful restaurants offering all types of food, tourist souvenir shops and small bars with live bands. I kind of wish we would have ventured out there sooner and explore it during the day. There was a mixed age crowd- we saw families with young kids, couples and singles of all ages. As we walked down further we did run into the party scene area but even that seemed fun although we didn’t venture inside any of them. Most of the clubs seemed to be open area spaces and they were packed!
Overall, my visit to Playa del Carmen was exactly what I needed to relax and recharge. If you are looking for a quiet resort to enjoy the beach/pool, good food and hopefully good company, then I highly recommend Andaz Mayakoba. Out of 5 stars, I would give it a 4.5 only because I would love to experience and compare how enjoyable the resort is during the busy season. I can’t stress enough how friendly and accommodating the entire staff was! It was comfortable in every way. If you are aiming for a more lively resort or something close to all the downtown action, then you should opt for a hotel closer to 5th avenue. Andaz Mayakoba is perfect for a friendly getaway, family adventure or even golf trip with your girls/guys.
This is by far the easiest costume I’ve ever put together and I’d recommend it for pretty much anyone. It’s perfect for the creative, non-creative, those in a rush or the budget conscious. Also keep in my mind this is a DIY- Do it Yourself Costume so you can completely costumize it to your style and preference!
The entire look can be created for $20 or less! I actually only spent $1 (literally $1 at Dollar Tree) since I already had the yellow dress, headband and glue. All I needed to buy was a green poster board. If you are starting from scratch the most expensive piece is probably the yellow outift.
Here’s what you need:
Yellow outfit– I used a dress but you can get creative here and use what works best for you you. Dress, t shirt, jumpsuit, it doesn’t matter as long as it’s yellow
1 Green poster board… you could probably use regular construction paper or card stock but the poster board was sturdy and provided a nice shape in my opinion
1 Toilet paper or paper towel roll
Glue… super glue or glue gun may work best. I started with regular craft glue but it wasn’t sticking well so I switched to super glue
1 Headband
(Optional) String or ribbon
1. Draw and cut out several leaf shapes varying in height. I cut 15 but I don’t think I used all of them.
2. Now start to glue the leaves around the toilet paper roll. First start with the tallest ones and keep going around until you fill up all the empty space. Then move on to the medium length, then short, so on and so on. It’s okay to layer/over lap them as you go.
TIP: If using regular glue or super glue it may be difficult at first to get the leaves to hold the shape around the roll but just keep holding them down and pressing on the glue so it dries in place.
As you continue to glue them around the roll, bend the tops slightly so they hang over to resemble a real pineapple.
3. Once you are done gluing the leaves it’s time to attach it to the headband. You can do this one of three ways: 1) poke two holes at the bottom and insert the headband (what I did), 2) use a glue gun to attach or 3) poke the two holes at the bottom but use a string/ribbon to connect it to the headband.
I chose the first option because I didn’t have a glue gun and figured this would be easiest. Be careful when making the holes not to rip apart the stem. Mine got a little messy but I was able to make it work. To make the holes I used a scissor at first and then carved them out a little more using a knife (CAUTION- be careful when doing this!).
You need to make one hole on each side and make sure they line up relatively well so that when you loop the headband through it is even.
And you’re done! I attached the stem at a slight angle but you can center it if you like.
Halloween is one of my favorite holidays and weirdly enough I started to embrace this holiday the most during college. When I was a kid of course it was fun but the whole process of researching, making and presenting my costume, didn’t become something exciting to me until I was in college. Over the years I’ve dressed up as the guy on the Pringles can (mustache and all), Thing 1 from Dr. Seuss, and an ice cream cone just to name a few.
This year I knew I would be in Mexico on vacation the days leading up to Halloween so I needed something quick and easy to wear to work for our annual costume party. After just a few minutes of brainstorming I came up with the idea of being a… PINEAPPLE! I decided on this mainly because it really only consists of two main parts- a yellow outfit and the stem headpiece. I instantly thought of this yellow a-line dress I could use (old purchase from NY and Company) so all I had to make was the head piece.
Check out a few pictures below of how it turned out and let me know your thoughts! 😀
P.S. I will be posting a step by step DIY breakdown on how I created the headpiece in just 10 minutes.